


Sails
| Part No. | Description | Quant. per Boat | Price (2026) |
| Mainsail Furling | 1,000 | ||
| Genoa Furling | 1,000 |
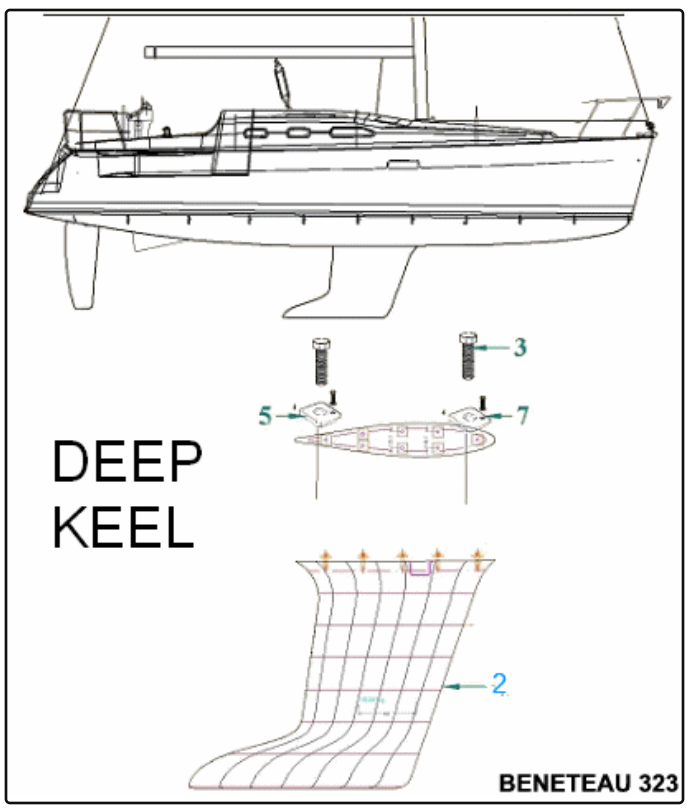
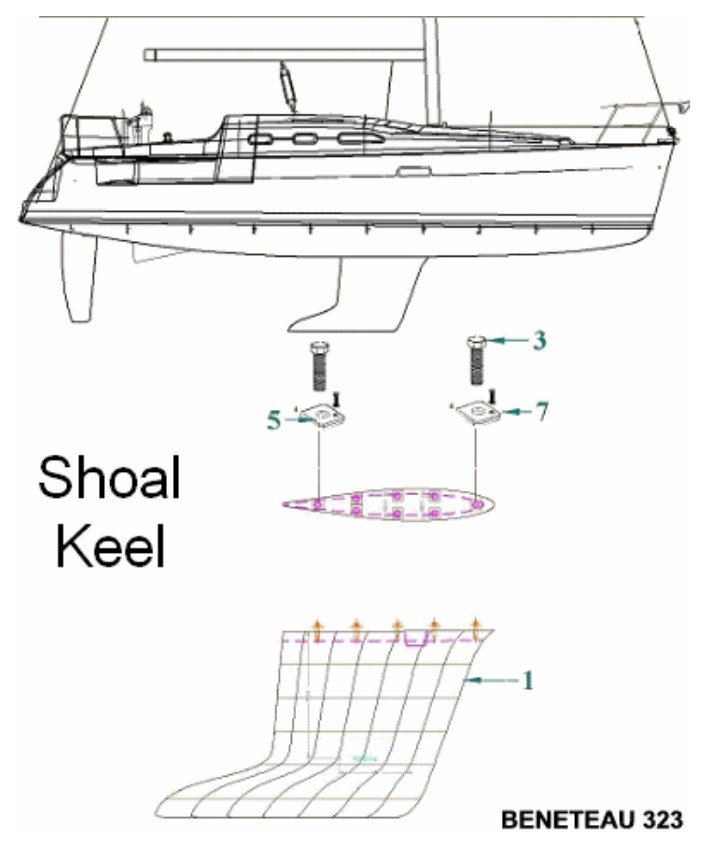
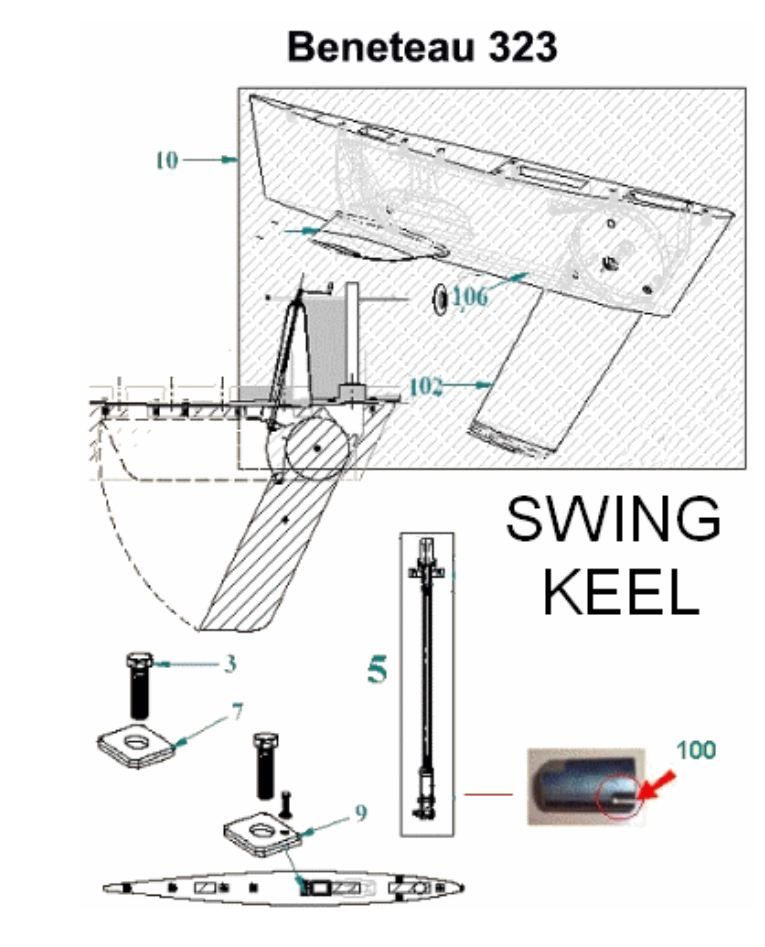
| Description | Qty | Part Number | Price + Shipping (2026) | |
| 5 | CENTERBOARD MECHANISM L415 V2 | 1 | 219569 | $3,042.00 |
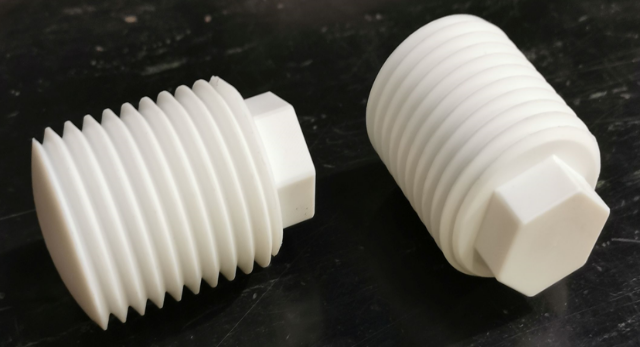
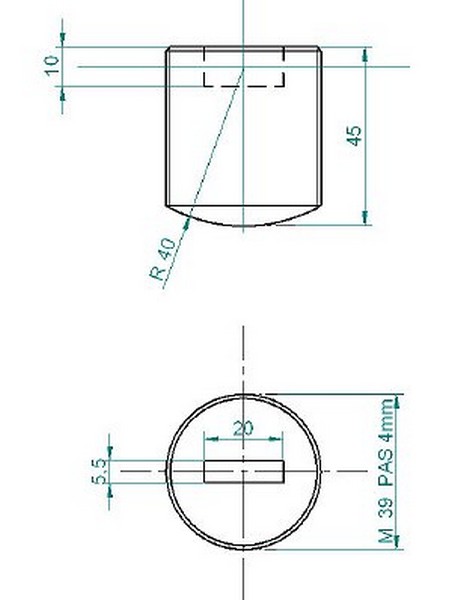
| 106 | CENTERBOARD PAD M39 L40 14361 | 051572 | $159.00 |
Beneteau 323 Q & A
Question:
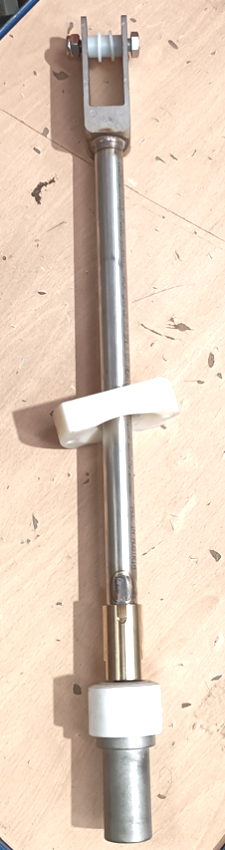
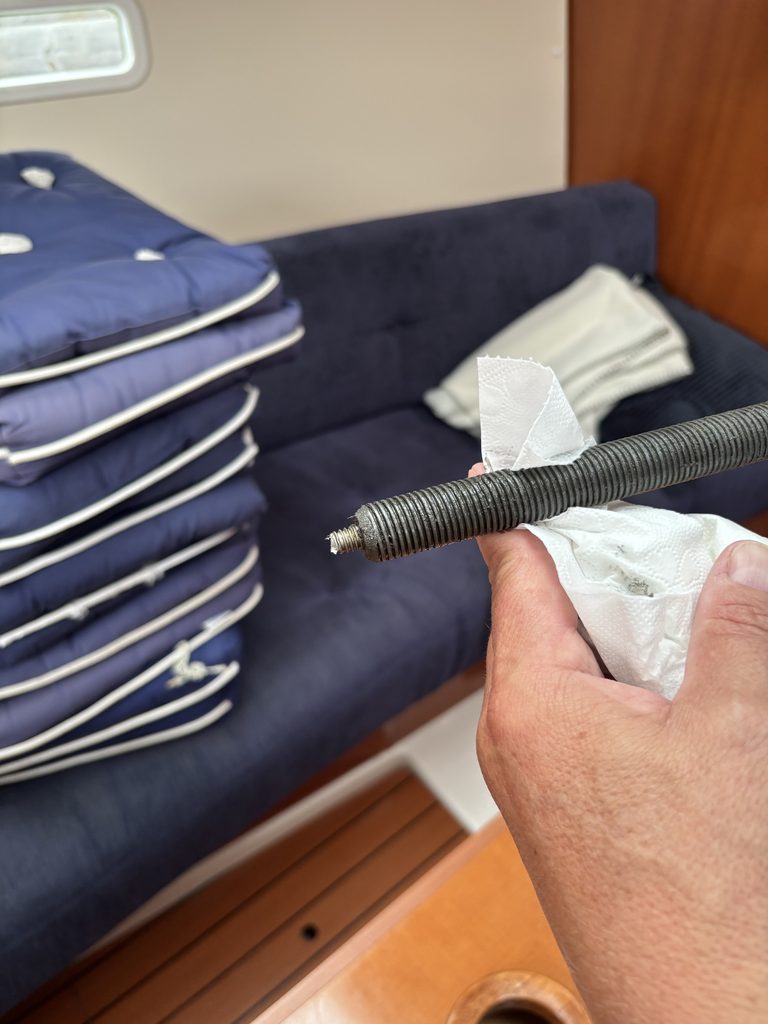
“I have a Beneteau Oceanis 323 with lifting keel and need some advice. When I went in to the harbour I was going to lift the keel up, but accidentally winched the wrong way which caused the small bolt connected to the keel mechanism to snap (shown in picture below). The keel is now stuck in the lowest position. Do you have any advice on how to fix this?”
Answer:
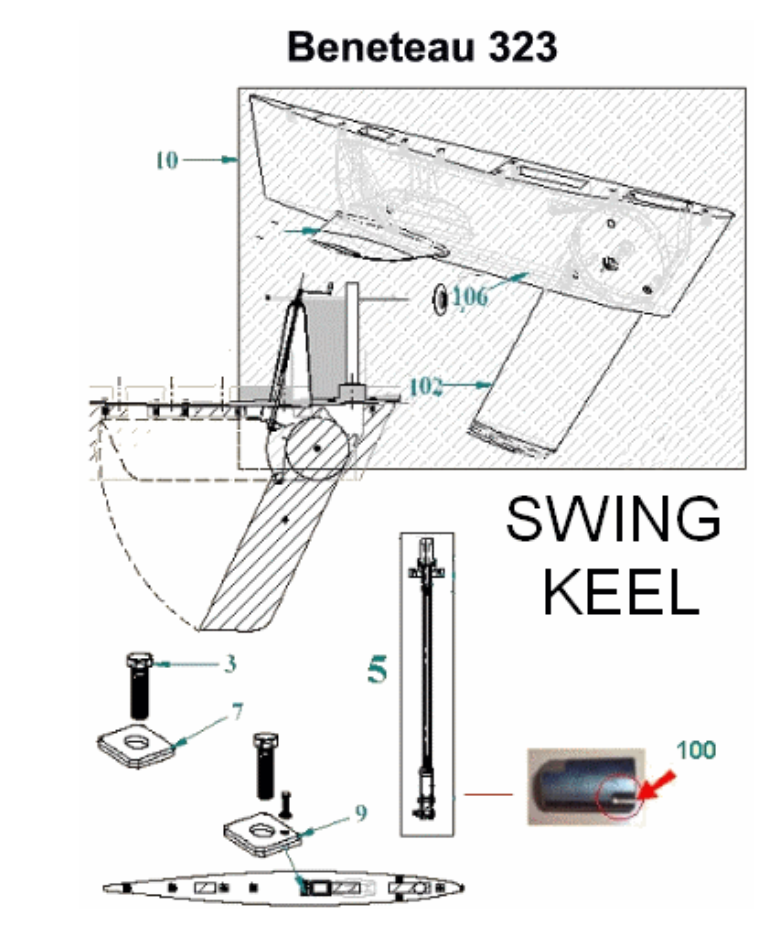
The bolt that snapped at the bottom end of the threaded worm-drive shaft (endless screw) is the safety/retaining bolt (typically a Hex M8 / THM8 bolt).
When you winched down past the maximum lower limit, the bronze nut jammed against the end of the shaft, overloading this retaining screw and shearing off the threaded stud. Because the main threaded rod is no longer secured at the bottom end, it cannot pull or lift the lower assembly/bronze nut back up, leaving the keel stuck down.
Step-by-Step Repair Process
1. Support the Keel & Remove load
The boat must be out of the water on a travelift/crane in straps, or on a drying grid/cradle.
- Do not attempt to fix this while afloat, as the lower attachment bolt connecting the mechanism to the swing keel is accessed from under the hull.
- Support the weight of the swing keel from underneath using wooden blocks or straps so there is no tension on the lifting mechanism.
2. Extract the Lifting Mechanism
- Disconnect Bottom Attachment: From underneath the boat, unscrew the lower connecting bolt that holds the mechanism to the swing keel. Keep track of the small nylon bush/spacer.
- Remove Top Bracket: Inside the cabin/saloon, remove the screws securing the nylon guide bracket at the top of the keel trunk/housing.
- Pull Out Assembly: Lift the complete worm-drive mechanism tube assembly up and out into the cabin.
3. Disassemble the Mechanism & Extract the Broken Screw
- Unscrew the bronze nut/collar from the main housing tube (Mark 5). Note: Beneteau uses strong thread-locker glue on these brass/bronze threads, so applying gentle heat with a heat gun to soften the compound may be necessary.
- Pull the threaded worm rod completely out of the tube.
- Extract the Sheared Stud:
- The remaining sheared threaded stud of the M8 bolt is stuck inside the base of the main shaft.
- File or grind the broken end flat, center-punch the center, and carefully drill a pilot hole.
- Use a screw extractor (Easy-Out) or drill/tap out the remnant to clear the internal threads. Take care not to damage the internal threads of the main shaft.
4. Reassembly & Prevention
- Source a replacement stainless steel M8 hex-head bolt of the same grade and length.
- Clean all old grease and thread-locker residue from the threads.
- Re-thread the brass nut back onto the endless screw.
- Fasten the new M8 retaining bolt into the end of the threaded shaft using medium-strength thread-locker (e.g., Loctite 242/243).
- Thoroughly coat the entire threaded rod with fresh marine grease (such as Motul LC300 or marine waterproof grease) before sliding it back into the main housing tube.
- Re-apply strong thread-locker (Loctite 271) to the brass/bronze retaining nut on the tube and tighten securely.
- Reinstall the assembly back through the trunk, re-attach the lower linkage to the swing keel with the nylon bush, and tighten top cabin fittings.
Operating Tip
To prevent this in the future, mark your winch handle or housing with visual indicators (or count the total turns between fully raised and fully lowered) to avoid forcing the winch past its travel stops.